Friday, November 30, 2012

Use of Input Range Slider

ADF has a long list of Rich look component. They are very easy to use and they give rich look to an application. One of these cool component is Range(selector).


This component is very use full to select two number values. It has some properties by which it is controlled. these are :


Minimum : Range start point.
Maximum : Range end point
Minimum Increment : The smallest possible increment or possible increment when user presses + or – button one time
Major Increment : Distance between two major ticks, major ticks has label.
Minor Increment : Distance between two minor ticks, minor ticks do not show label.


In image:
Minimum : 0
Maximum : 100
Minimum Increment :1
Major Increment : 10
Minor Increment : 5


The main property of this component is value. It contains two values maximum and minimum. Its contains value of form oracle.adf.view.rich.model.NumberRange object.
To get its value first bind this component to java bean class.
private RichInputRangeSlider range; 

Get its value
NumberRange sliderValue =getRange().getValue(); 
To get minimum and maximum selected value :
Integer minVal = sliderValue.getMinimum().intValue(); 
Integer maxVal = sliderValue.getMaximum().intValue(); 
Now use these value as you need. Play with another component of ADF 

Adios. 

Thursday, November 29, 2012

Create weblogic domain for production environment

Fromlast post now its next step, to create a weblogic server domain. We can do this process through commands in Unix based operating system and in windows. Here I will use the domain creation wizard to create the domain.

Go to start menu → weblogic → weblogic server 11g r1 → tools → Configuration wizard.


On clicking configuration wizard will start it will ask for creation of weblogic domain or extend a already created weblogic domain. Select create a new weblogic domain and click next.


Next screen is to select product which your weblogic server will support . As weblogic server domain will be used for ADF application deployment so select Oracle JRF . 


Now give your domain name and location of domain. Click next.


Assign Username password for weblogic administration. 
 

Now select production mode for domain. This will set server for production environment. Select java sdk which already installed with weblogic server. Click next.


Check for optional configuration. Select admin server, managed server and deployments and services.


Configure admin server, select listen address and port on which server will run.


Create a new managed server, assign listen address and port for managed server. Port shoul be different from managed server's port. Creation of managed server can be done after domain creation from weblogic server console.


Skip cluster configuration. 
 

Create machine for admin and managed server give node manger listen address and port. Node manager is used to start server remotely. Node manager can be installed as a windows service. I will show that later.


Assign machine to both admin and managed server by moving them to right part of shuttle. Go to next step.


This step shows libraries and applications which will be deployed on admin and managed server. 
 

Select managed server o left side, now select library on the right side. These libraries are of supported technology here ADF libraries are included. 
 

Skip next step.


Next step shows configuration summary. 
 

Now configuration is complete.


Now start weblogic server from weblogic home /user_projects/domains/<Domain Name>/bin/startWebLogic.cmd . After running cmd file it will ask for username password 
 

After authentication server will start after few seconds . 
 

Admin server of this new domain now running , you can open server console in web browser at the address you have given at the time of domain creation. In production mode applications are deployed on managed server so next is to start managed server. In weblogic domain console all things are done through admin. To start managed server open cmd in windows. Go to bin location inside created domain.


Type startManagedWeblogic.cmd <managed server name> http://<admin serevr listen address: port> 
 

After few seconds managed server will run.


You can see server status in weblogic admin console. Go to environment → servers.


Now domain is ready for deployment. In next post I will show how to deploy an application on Managed server.  

Friday, November 2, 2012

Installation Of ADF Runtime Environment to Weblogic Server

In previous post I show the Installation process of Weblogic server. This post is in continuation. 
Now to run ADF application on weblogic server first we have to install ADF runtime in to Weblogic server. This will provide needed ADF library in weblogic server so that ADF application can be deployed in to the server. ADF run time is not installed in to weblogic server autometically, it is done manually.
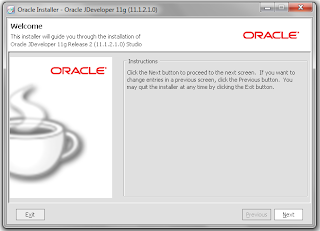
To do this we need Jdeveloper installer. Run Jdeveloper Installer in welcome screen click next to start setup.


Go to next screen , this will show option to select existing middleware home or to create a new middleware home. Choose an existing home where weblogic server is installed. Here home for weblogic server is (C:\Oracle\Middleware). Then click next.


This screen shows Components this installer can install. Weblogic server component will come disabled as it is already installed in this middleware home, we just need ADF runtime, So we will select this option . No need to install jdeveloper. Click Next to proceed.


On JDK selection option, SUN SDK already selected as weblogic is installed with SUN SDK. So simply click next in this step.


Next step is for selection of installation directory. As this middleware home is created previously so skip this step and press next button.


Now screen is showing installation summary. Click next to proceed.


Now installation process is started .


At the end installation is complete message comes. Click on done button will exit the installation.


Weblogic server is now ready for ADF application Deployment. Next step is to Create a new domain in weblogic server for production mode.

Thursday, November 1, 2012

Installation Of Weblogic Server

Oracle have provided Weblogic Server to run ADF application created in Jdeveloper. when we install Jdeveloper Weblogic Server also get installed. This is our scenario for development. Now we need to install stand alone Weblogic Server to a machine for production purpose.

Here I will show the steps of installation of stand alone Weblogic Server.

Run setup for weblogic server.


A welcome window will come up to start installation of weblogic server. Click next button to start installation.


 Next screen will ask for a middleware home. If you want to use existing home then select one of the appeared home or simply create a new one.


Click next to go to next step. Select custom installation type. In typical it installs Oracle coherence and Oracle Enterprise pack for Eclipse. We do not need them, so choose custom installation


Go to next step by clicking next.  This screen shows components to install. Select Weblogic server and leave other option unchecked


Go to next step. There are two option for java installation first one is Sun SDK and other is Oracle JRockit . Choose Sun SDK and click next.


In next window it will show where weblogic server will be installing.


Now select no option for Node manager service. We will do this later manually.


Choose shortcut option for weblogic server. Click next.


Next window shows summery of installation.


Clicking next button will start process of installation.


After installation it shows complete message in window. Done will exit the process. 

This is the process of weblogic server installation.